Birthday and Anniversary Reports
These two commonly used reports are pre-formatted to make them as simple and fast as possible for users to run. Both reports follow nearly the exact same steps.
To view or print the Birthday and Anniversary Reports:
- From The Initial Portal of Church Windows choose Membership.
- Click Reports/Export in the Button Bar at the top of the screen.
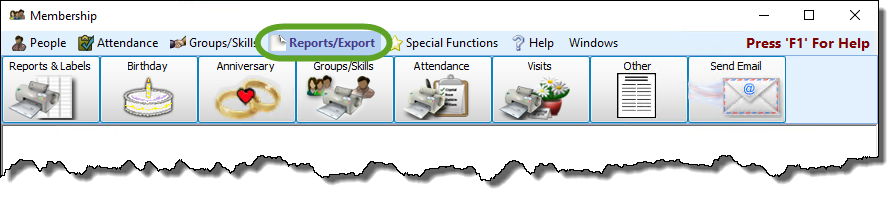
- Then choose either the "Birthday" or "Anniversary" button.
- For either report you will have the standard three choices: Reports / Directory / Exports, Labels, and Send Email.
- For this exercise, choose Reports / Directory / Export:

Step 1 — Select who should appear on the Birth Date / Anniversary List
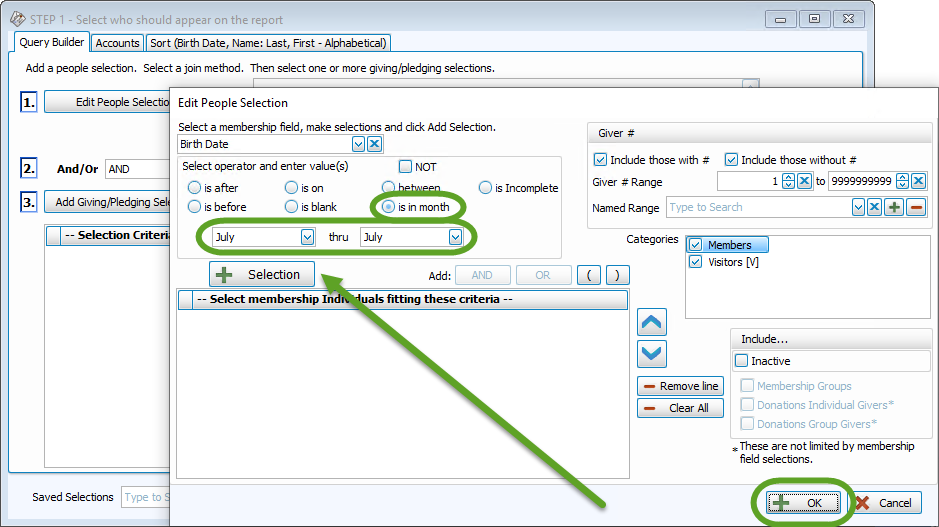
When you select either Birthday or Anniversary, it will automatically open the People Selection Criteria and have Birth Date or Anniversary Date selected as the "Membership field" and it will have the "is in month" operator selected along with the current month. You may change this to a different month, set of months, the whole year set it to January thru December, or another operator.

When you have finished press the
Add Selection button then click OK:
You may also add any additional search criteria, as needed (e.g. Directory/Report Order, Age, Gender, etc.), on the People Selection Criteria to further limit the results to a smaller group of people.
Note:
In order for couples to be included on Anniversary Reports, they must both have the Marriage Date field filled out with the same date, they must be in the same family, and one must be the 1 — Primary and the other must be the 2 — Secondary, otherwise both spouses will be excluded from the report.Giving / Pledging and Accounts Tabs
The Giving / Pledging Selection Criteria and Accounts Tab the can typically be skipped for these reports, however they are available if you need to include them.
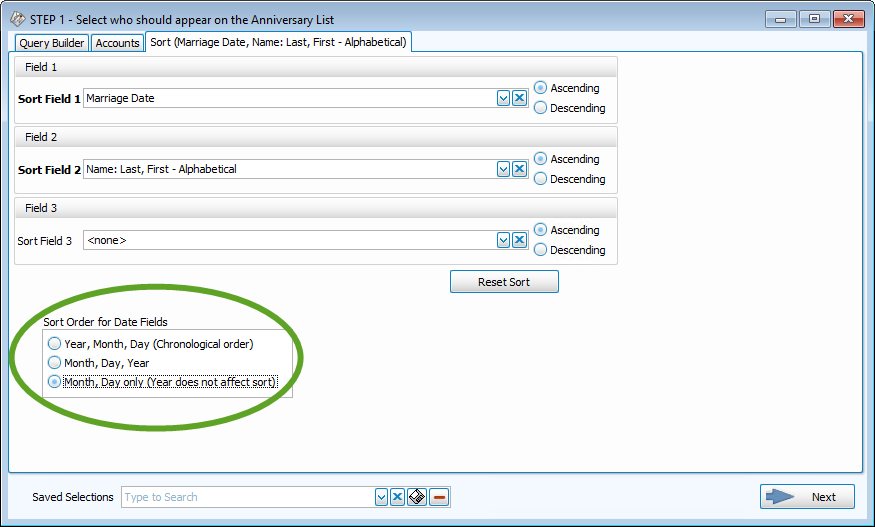
Sort Tab
On the Sort Tab , pay special attention to the "Sort Order for Date Fields" box in the bottom left and make the desired selection. The sort order will automatically be set to the Birth / Marriage Date for Sort Field 1 and then Name for Sort Field 2:
For either report, once you have selected all your criteria, click on the → Next button .
Step 2 — Select the Report Layout / Format
This screen will allow you to choose from a variety of pre-existing report formats that come imbedded in the program, or let you create and customize your own:
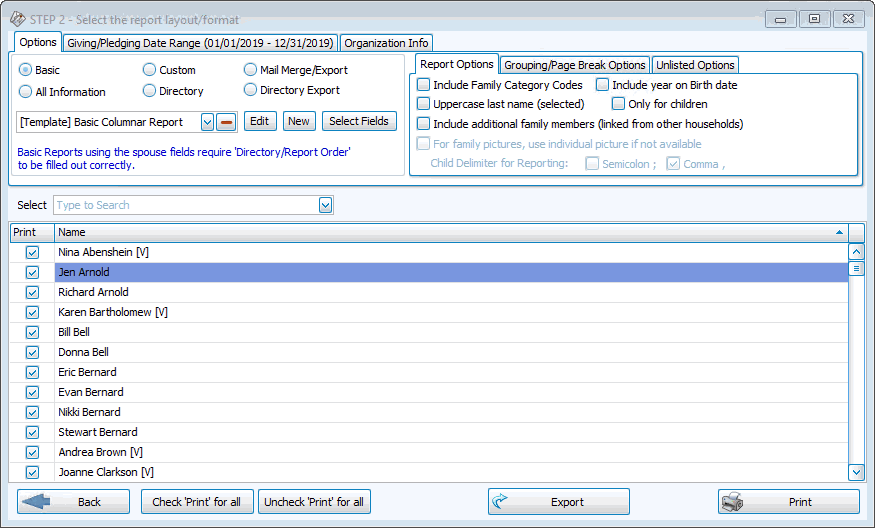
The six options at the top are report layout options that have been created already and include information that is usually used on reports in a format that is simple and easy to read. If you choose Basic, then "[Template] Basic Columnar Report" will include:
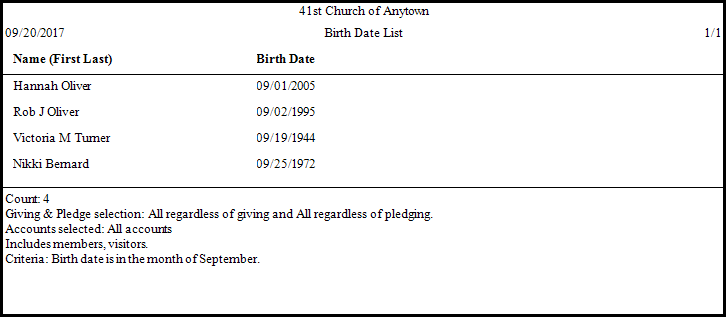
Birthday Reports
- the First and Last Name of the person
- their Date of Birth
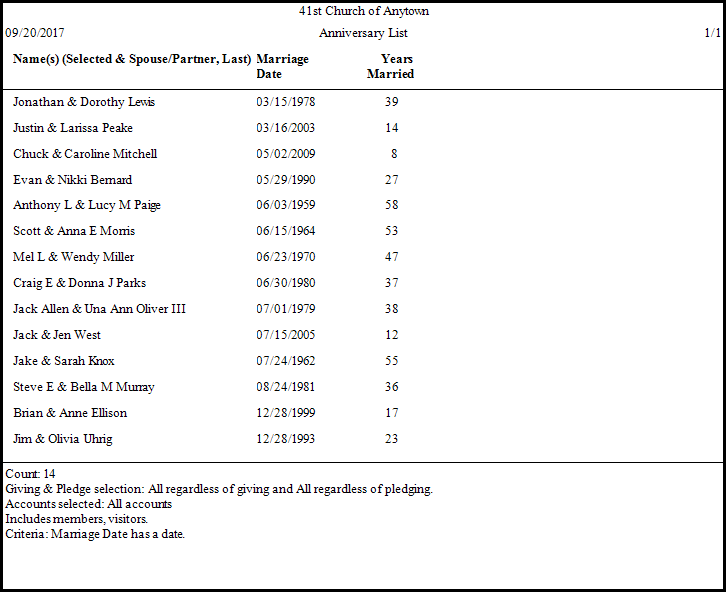
- the First & Last Names of the two spouses
- their Marriage Date
- the number of Years they've been married (only if the year is included in the Marriage Date and the correct field is selected on the Set Anniversary Date tab)
If you have determined that none of the pre-existing formats fit your needs and you need to add or remove the different columns that are showing, you will need to select "New". This will bring up the New Report Setup screen:
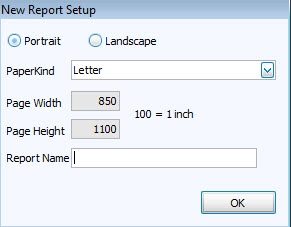
If needed, you can change it to Landscape if you wanted to make a report that print sideways/lengthwise, and if you need it to be something other than 8.5x11 inches. Make sure you name the report appropriately as to make it easier to recognize in the future.
Note:
When naming a new report layout, keep in mind that you are creating a template which can be used for other reports with different data in the future, therefore names should NOT include specific dates or the search criteria you used to compile the report. Instead, the name should indicate what kind of information will be included in the report.
Select the columns you would like to include on your Birthday or Anniversary Report:
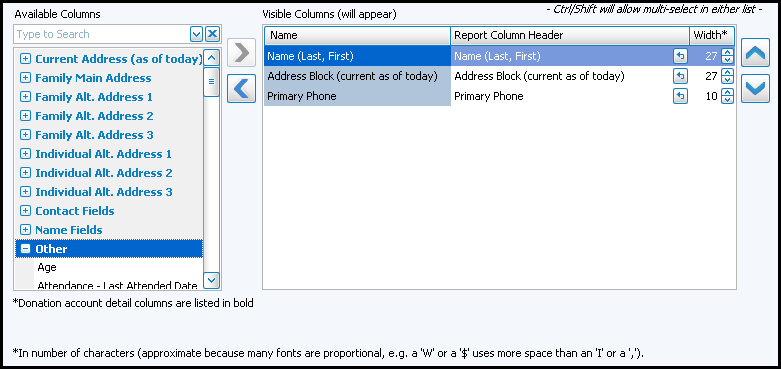
Column Selector
The Column Selector or Columns Tab allows you to decide which fields from The Individual Record or The Family Record will be visible on the report and which will not be visible.
On the left hand side Available Columns are the columns that are not showing but are available to be shown if desired. On the right side Visible Columns are the columns that are currently selected to be shown:
- If needed, to browse the Available Columns, click the
to expand a group of fields or use the "Type to Search" dropdown
box to choose a column.
- You can either highlight the column and use the
left and
right arrow buttons to bring it back and forth, or double click on it to move it to the opposite side of the screen.
- Use the
up and down arrow buttons to rearrange the order of the columns.
- Underneath the Visible Columns on the right is a space for the "Report Column Header". You can edit this text to label that field differently on your printed / exported report without changing the actual column name in the database.
For example, you could remove "(current as of today)" from the Address field's Report Column Header, as it would likely be unnecessary to include on the report.- Each column is set to print at a certain column width automatically. You can also change the width of the columns that show on the report. Raise or lower the number in the Width* column according to your preference.
- Click OK when you are satisfied with your column selections.
- You can click on the 'Select Fields' button to the right of the report name dropdown list to reopen the Column Selector and make additional changes later.
Once you have made all of your selections, click Print to view a Print Preview and then proceed in sending the file to your printer. You can also Export most reports and/or Send via Email as a file to be used outside of Church Windows.